You know that moment when you’re watching a cooking show and the chef casually throws a few perfect chocolate shards on a dessert like it’s no big deal?
Meanwhile, you’re just trying not to burn your toast. Yeah, I get it. But here’s the secret: chocolate shards are one of the easiest fancy-looking things you can make. Seriously.
They’re like the little black dress of dessert garnishes—simple, classy, and somehow effortlessly cool.
Let’s be honest. Whether you’re topping a cake, jazzing up a bowl of ice cream, or giving your homemade truffles a bit of an edge (literally), chocolate shards are your new best friend. You don’t need a culinary degree or a passport to Paris.
You just need chocolate, a flat surface, and about 10 minutes of your life.
Let’s make some magic happen.
Easy Chocolate Shards
Ingredients
Equipment
Method
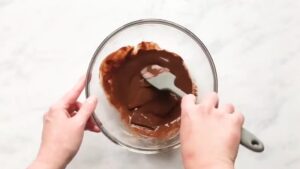
- Melting the ChocolateMethod 1: Microwave (Quick & Easy)Break chocolate into small, even pieces.Place in a microwave-safe bowl.Microwave on medium power for 30 seconds, then stir.Continue heating in 20–30 second bursts, stirring in between.When about 80% melted, remove and stir until fully smooth.Method 2: Double Boiler (Controlled & Traditional)Simmer 1 inch of water in a saucepan.Set a heatproof bowl on top (not touching the water).Add chocolate to the bowl.Stir occasionally until melted and glossy.Remove from heat and stir smooth.
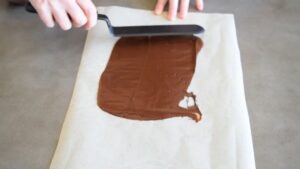
- Spreading the ChocolateLine a baking sheet with parchment paper or a silicone mat.Pour melted chocolate into the center of the sheet.Use an offset spatula or spoon back to spread it thin or thick—your choice.Keep edges rustic or smooth them for uniform shards.While still soft, add optional toppings if desired.Let set at room temperature or refrigerate for 10–15 minutes until fully hardened.
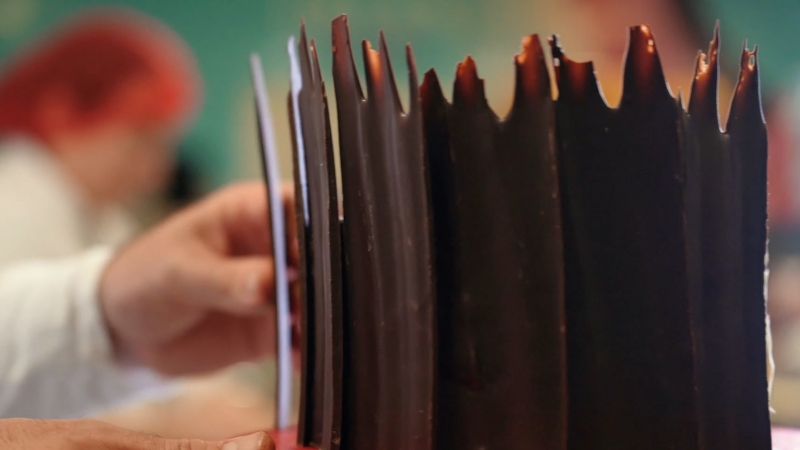
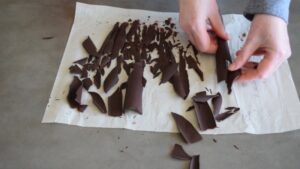
- Breaking Into ShardsOnce set, peel chocolate off the parchment/mat.Break by hand for rustic shards, or use a sharp knife for cleaner edges.Store shards in an airtight container at room temp (or fridge if warm).
Video
Notes
Cooking Tips
- Make sure your tools are completely dry—even a drop of water can ruin melted chocolate.
- Thin spreads = delicate shards. Thicker layers = chunky bites. Choose your texture.
- Add toppings right away while the chocolate is still melted.
- Don’t stress over looks—rustic shards are charming too.
- For glossy shards and long shelf life, temper your chocolate (optional, but pro-level!).
Storing Your Chocolate Shards
View this post on Instagram
Storing your chocolate shards properly ensures they stay fresh and delicious for as long as possible.
Once you’ve made them and admired your handiwork, transfer the shards to an airtight container.
Room temperature works best for about a week, as long as your environment isn’t too warm.
If you live in a hotter climate or notice your chocolate starting to get soft, the fridge is a safe bet.
Just keep in mind that refrigeration may cause the chocolate to lose some of its shine, but don’t worry—the flavor stays just as rich and satisfying.
Even if they aren’t as glossy, they’re still absolutely worth enjoying.
Troubleshooting: When Chocolate Gets Feisty
Sometimes, despite your best efforts, your chocolate shards might develop a dull appearance or white streaks.
Don’t panic—this isn’t a sign of spoilage. It’s either fat bloom or sugar bloom, both of which are harmless and purely cosmetic.
Fat bloom happens when cocoa butter rises to the surface, while sugar bloom occurs when moisture causes sugar to dissolve and then recrystallize.
If you’re aiming for that flawless, shiny finish, tempering your chocolate before spreading is the way to go.
However, if tempering sounds like too much hassle, simply store your shards in a cool, dry place to minimize the chances of blooming.
Even if they don’t look perfect, they’ll still taste fantastic, and honestly, they’re still way more impressive than a plain dessert.
Why Chocolate Shards Are Worth the Effort
@petites_choses Easiest way to make chocolate shards! أسهل طريقة لصنع زخارف الشوكولاتة #recipe #easyrecipe #dessert #وصفات #وصفات_سهله #christmas ##chocolate #cakedecorating ♬ Merry Christmas and Happy New Year – neozilla
Chocolate shards are the ultimate secret weapon of dessert decorating—simple, affordable, and undeniably impressive.
They elevate everything from cakes to ice cream, giving your creations that extra flair with minimal effort. Plus, they’re endlessly customizable.
You can make them fit any mood or occasion, whether you’re going for classic elegance or quirky creativity.
It’s amazing how just a few shards can make a dessert look like it came straight out of a fancy patisserie.
Hi, I’m Lili Harmon. Baking and making desserts are my passion. I love spending time in the kitchen, experimenting with new recipes, and perfecting old favorites. Whether it’s whipping up a batch of cookies, crafting a delicate pastry, or creating a decadent cake, the kitchen is my happy place. That’s why I wanted to share some of my best recipes with you.