Indulging in a delectable dessert is like taking a delightful journey through the world of flavors. Whether it’s the rich, velvety smoothness of chocolate or the zesty burst of citrus, desserts have a magical way of captivating our taste buds and warming our hearts.
In this sweet adventure, we’ll explore ten easy-to-make fancy desserts that are sure to impress your guests. From the interactive charm of chocolate fondue to the timeless elegance of creme brulee, these treats will elevate your hosting game without demanding hours of preparation.
So, tie your apron strings, get your mixing bowls ready, and let’s embark on a scrumptious escapade into the realm of delightful desserts.
10. Chocolate Fondue
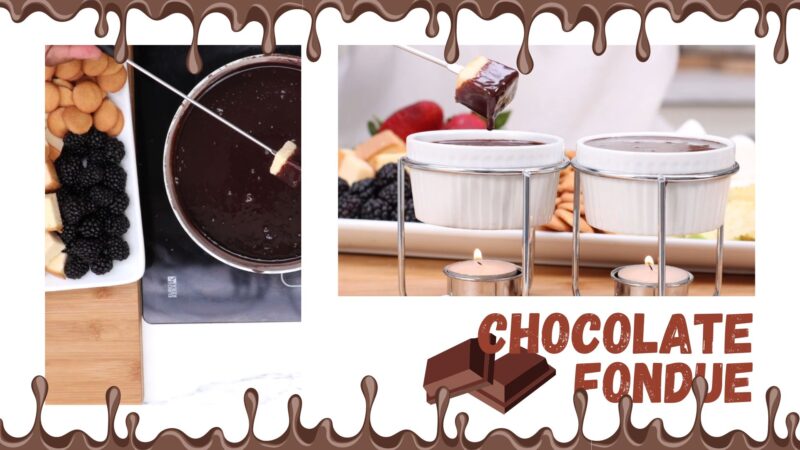
The origins of chocolate fondue can be traced back to Switzerland in the 1960s. It was popularized by a Swiss chef named Konrad Egli, who aimed to create an interactive dessert that would bring people together. The idea of dipping fruits and treats into a pot of melted chocolate quickly spread across the globe, becoming a beloved dessert for parties and gatherings.
Ingredients:
- 8 oz (227g) high-quality dark chocolate, chopped
- 1 cup heavy cream
- Assorted fruits (strawberries, bananas, grapes)
- Marshmallows
- Cookies or biscotti for dipping
Instructions:
- In a heatproof bowl, add the chopped dark chocolate.
- In a saucepan, heat the heavy cream over medium heat until it starts to simmer.
- Pour the hot cream over the chopped chocolate and let it sit for a minute.
- Stir the mixture until the chocolate is fully melted and smooth.
- Transfer the chocolate fondue to a fondue pot or a serving bowl with a tealight candle underneath to keep it warm.
- Arrange the assorted fruits, marshmallows, and cookies on a platter.
- Invite your guests to dip their desired treats into the warm, luscious chocolate fondue and enjoy!
9. Lemon Mousse
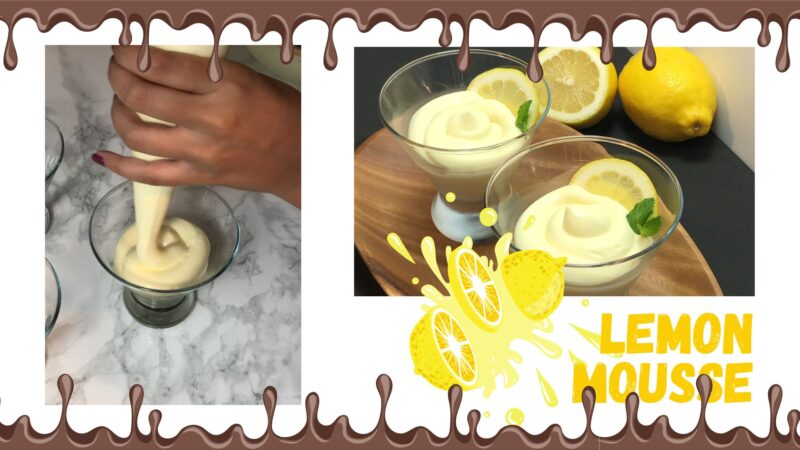
Mousse, in general, has a rich history dating back to 18th-century France. However, lemon mousse, with its zesty and refreshing flavor, gained popularity in the early 20th century. French chefs started incorporating lemon juice into traditional mousse recipes, creating a tangy twist on the classic dessert that soon became a hit among those with a penchant for citrusy delights.
Ingredients:
- 1 cup heavy cream
- 1/2 cup powdered sugar
- 1/3 cup freshly squeezed lemon juice
- 1 tablespoon lemon zest
- Lemon slices and additional zest for garnish
Instructions:
- In a large mixing bowl, whip the heavy cream and powdered sugar until stiff peaks form.
- Gently fold in the lemon juice and lemon zest until well combined.
- Transfer the lemon mousse into individual serving glasses.
- Chill the mousse in the refrigerator for at least 2 hours or until set.
- Garnish each serving with lemon slices and a sprinkle of lemon zest before serving.
8. Pavlova
This iconic dessert was named after the Russian ballet dancer Anna Pavlova during her tour to Australia and New Zealand in the 1920s. While both countries lay claim to its invention, it is believed that the pavlova’s creation was inspired by the dancer’s ethereal grace and delicate presence. With its crisp meringue shell, soft center, and an abundance of fresh fruits, the pavlova continues to dance its way into the hearts of dessert enthusiasts worldwide.
Ingredients:
- 4 large egg whites, at room temperature
- 1 cup granulated sugar
- 1 teaspoon cornstarch
- 1 teaspoon white vinegar
- 1/2 teaspoon vanilla extract
- 1 cup whipped cream
- Assorted fresh fruits (berries, kiwi, passion fruit)
Instructions:
- Preheat your oven to 250°F (120°C) and line a baking sheet with parchment paper.
- In a clean, dry mixing bowl, beat the egg whites on medium speed until soft peaks form.
- Gradually add the sugar, cornstarch, vinegar, and vanilla extract while continuing to beat until glossy peaks form.
- Spoon the meringue onto the prepared baking sheet, forming a circle or individual nests.
- Bake the pavlova for 1 hour or until the outer shell is crisp. Let it cool completely.
- Top the pavlova with whipped cream and arrange the fresh fruits on top.
- Serve the pavlova immediately or refrigerate until ready to serve.
7. Tiramisu
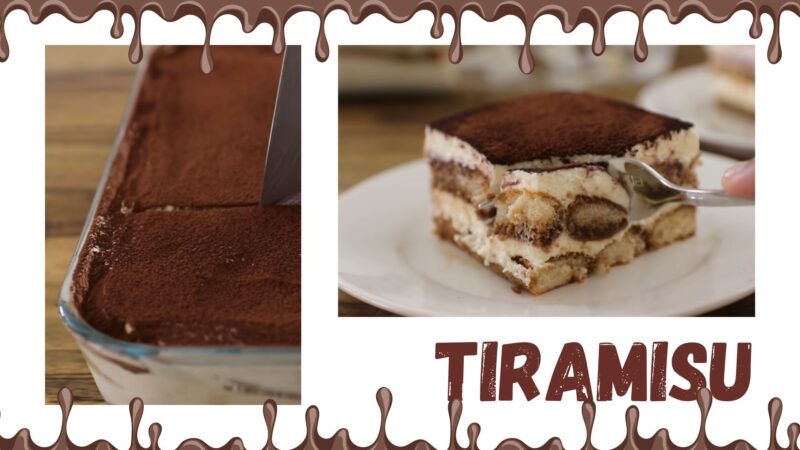
Hailing from the romantic city of Venice, Italy, tiramisu has a relatively recent history, emerging in the 1960s. The name “tiramisu” translates to “pick me up,” referring to the dessert’s energizing blend of coffee and cocoa. Legend has it that it was created as a revitalizing treat for exhausted Venetian workers. Today, this luscious layered dessert is a global favorite, enchanting taste buds with its coffee-soaked ladyfingers and velvety mascarpone.
Ingredients:
- 1 cup brewed espresso or strong coffee, cooled to room temperature
- 24-30 ladyfinger cookies (Savoiardi)
- 16 oz (450g) mascarpone cheese, softened
- 1/2 cup granulated sugar
- 1 teaspoon vanilla extract
- Unsweetened cocoa powder, for dusting
- Dark chocolate shavings, for garnish
Instructions:
- In a shallow dish, pour the cooled espresso or coffee.
- Dip each ladyfinger into the coffee briefly, ensuring they are soaked but not soggy.
- Arrange a layer of soaked ladyfingers at the bottom of a serving dish or individual glasses.
- In a separate bowl, whisk together the softened mascarpone, sugar, and vanilla extract until smooth.
- Spread half of the mascarpone mixture over the ladyfingers.
- Repeat the layers with the remaining ladyfingers and mascarpone mixture.
- Cover and refrigerate the tiramisu for at least 4 hours, allowing the flavors to meld together.
- Just before serving, dust the top with cocoa powder and sprinkle dark chocolate shavings for an elegant finish.
6. Mini Fruit Tarts
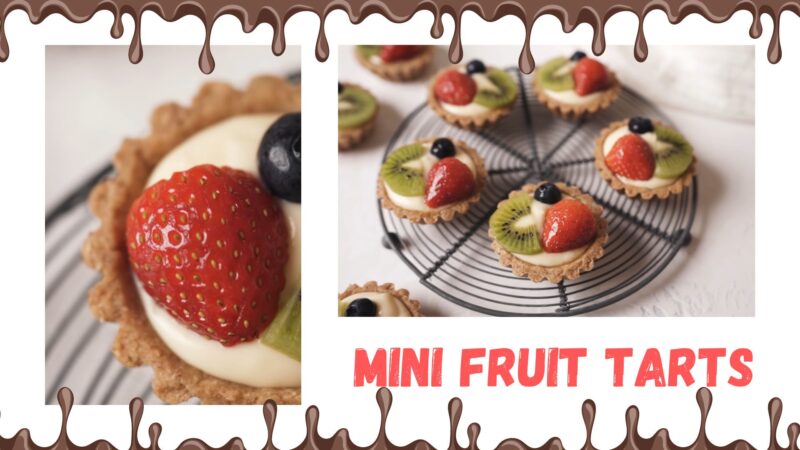
Fruit tarts, with their delightful medley of flavors and textures, trace their roots to ancient civilizations where early bakers experimented with combining fruit and pastry. The French, renowned for their culinary expertise and desserts, elevated fruit tarts to an art form during the Renaissance. Today’s mini fruit tarts are a testament to that tradition, offering bite-sized portions of joy with a mix of buttery crust, creamy filling, and vibrant fresh fruits.
Ingredients:
- Pre-made mini tart shells
- 1 cup pastry cream or custard (store-bought or homemade)
- Assorted fresh fruits (strawberries, blueberries, raspberries)
- Apricot jam (or any fruit preserves) for glazing
Instructions:
- Preheat your oven according to the instructions on the tart shell package.
- Fill each tart shell with pastry cream or custard, leaving some space at the top for the fruits.
- Arrange the fresh fruits on top of the cream in an aesthetically pleasing manner.
- In a small saucepan, gently heat the apricot jam until it becomes liquid.
- Using a pastry brush, glaze the fruits with the warm apricot jam for a glossy finish.
- Refrigerate the mini fruit tarts until ready to serve.
5. Chocolate-Covered Strawberries
Chocolate-covered strawberries have their origins in the United States in the mid-20th century. The concept of combining luscious strawberries with decadent chocolate was popularized during the 1960s, and the treat quickly became a symbol of romance and indulgence, often associated with Valentine’s Day and special celebrations.
Ingredients:
- Fresh strawberries with stems
- 8 oz (227g) high-quality dark or milk chocolate, chopped
Instructions:
- Line a baking sheet with parchment paper.
- In a microwave-safe bowl or using a double boiler, melt the chopped chocolate until smooth.
- Holding a strawberry by the stem, dip it into the melted chocolate, coating it about two-thirds of the way up.
- Place the chocolate-covered strawberry on the prepared baking sheet.
- Repeat the process with the remaining strawberries.
- Allow the chocolate to set at room temperature or speed up the process by placing the tray in the refrigerator for a few minutes.
- Serve the chocolate-covered strawberries on a decorative platter or in individual cupcake liners.
4. Creme Brulee
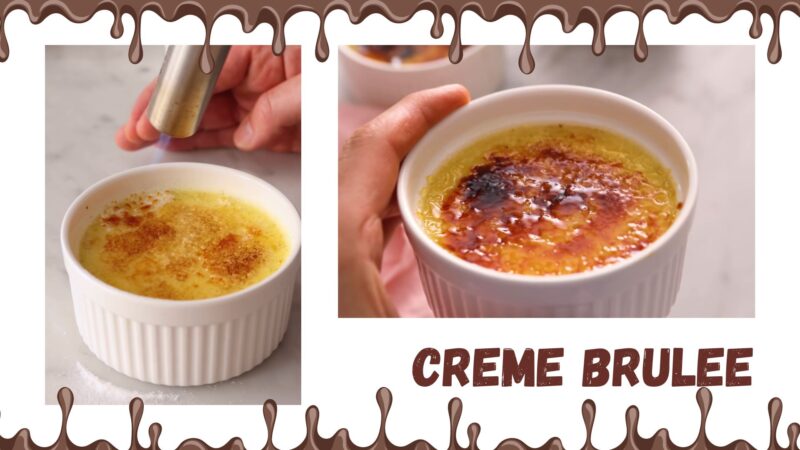
Creme brulee’s origins can be traced back to France in the 17th century. This classic dessert was initially a favorite among the French aristocracy due to its luxurious ingredients—egg yolks, cream, and sugar. The finishing touch of caramelized sugar on top, achieved by using a red-hot iron, created a thin, crisp crust that set creme brulee apart as an elegant and sophisticated dessert.
Ingredients:
- 1 cup heavy cream
- 4 large egg yolks
- 1/4 cup granulated sugar
- 1 teaspoon vanilla extract
- Brown sugar for caramelizing
Instructions:
- Preheat your oven to 300°F (150°C).
- In a saucepan, heat the heavy cream over medium heat until it starts to simmer. Remove from heat.
- In a separate bowl, whisk together the egg yolks, granulated sugar, and vanilla extract until well combined.
- Gradually pour the hot cream into the egg mixture, whisking continuously to avoid curdling.
- Strain the mixture through a fine-mesh sieve into a pouring jug to remove any lumps.
- Divide the custard among ramekins or oven-safe serving dishes.
- Place the ramekins in a large baking dish and fill it with hot water, about halfway up the sides of the ramekins (water bath method).
- Bake the creme brulee for 30-35 minutes or until the edges are set but the center is slightly jiggly.
- Remove the ramekins from the water bath and let them cool to room temperature.
- Cover the ramekins and refrigerate them for at least 4 hours or overnight.
- Just before serving, sprinkle a thin layer of brown sugar on top of each custard.
- Caramelize the sugar using a kitchen torch until it turns golden and forms a crispy crust.
- Serve the creme brulee immediately for that satisfying crack of the caramelized sugar.
3. Churros with Chocolate Sauce

Churros, believed to have been inspired by a Chinese pastry called “youtiao,” made their way to Spain through Portuguese explorers. The Spaniards put their spin on the treat by coating the fried dough with sugar and cinnamon. Today, churros are enjoyed worldwide, especially when dipped in a velvety chocolate sauce, which further enhances their delectable appeal.
Ingredients:
- 1 cup water
- 2 tablespoons granulated sugar
- 1/2 teaspoon salt
- 2 tablespoons vegetable oil
- 1 cup all-purpose flour
- 1/4 cup unsalted butter
- 1 cup chocolate chips
- 1/2 cup heavy cream
Instructions:
- In a saucepan, combine the water, sugar, salt, and vegetable oil. Bring it to a boil.
- Remove the pan from heat and add the all-purpose flour. Stir vigorously until a smooth dough forms.
- Transfer the dough to a piping bag fitted with a star tip.
- In a large skillet, heat vegetable oil to about 350°F (180°C).
- Pipe strips of dough directly into the hot oil and fry until golden brown on both sides.
- Remove the churros from the oil and drain them on a paper towel.
- In a separate saucepan, heat the unsalted butter and heavy cream until the butter is melted.
- Add the chocolate chips and stir until smooth, creating a rich chocolate dipping sauce.
- Serve the churros warm with the chocolate sauce for dipping.
2. Poached Pears
Poached pears have roots in medieval European cuisine, where the art of poaching fruit was favored among nobility. This dessert’s delicate flavor is achieved by gently simmering ripe pears in a fragrant spiced liquid, often made with wine and sweeteners. The result is tender, elegant pears that offer a delightful ending to any meal.
Ingredients:
- 4 ripe pears, peeled and cored
- 2 cups red wine (such as Merlot)
- 1/2 cup granulated sugar
- 1 cinnamon stick
- 4-5 whole cloves
- 1 vanilla bean, split
- Vanilla ice cream or whipped cream for serving
Instructions:
- In a large saucepan, combine the red wine, granulated sugar, cinnamon stick, whole cloves, and vanilla bean.
- Bring the mixture to a simmer over medium heat, stirring to dissolve the sugar.
- Gently add the peeled and cored pears to the simmering liquid.
- Reduce the heat to low and poach the pears for 15-20 minutes or until tender, turning occasionally for even coloring.
- Using a slotted spoon, remove the poached pears from the liquid and set them aside to cool slightly.
- Increase the heat to medium-high and let the liquid simmer until it reduces to a syrupy consistency.
- Remove the cinnamon stick, cloves, and vanilla bean from the syrup.
- To serve, place a poached pear in a dessert dish and drizzle the reduced syrup over it.
- Add a scoop of vanilla ice cream or a dollop of whipped cream on the side for a delightful pairing.
1. Nutella and Raspberry Crepes
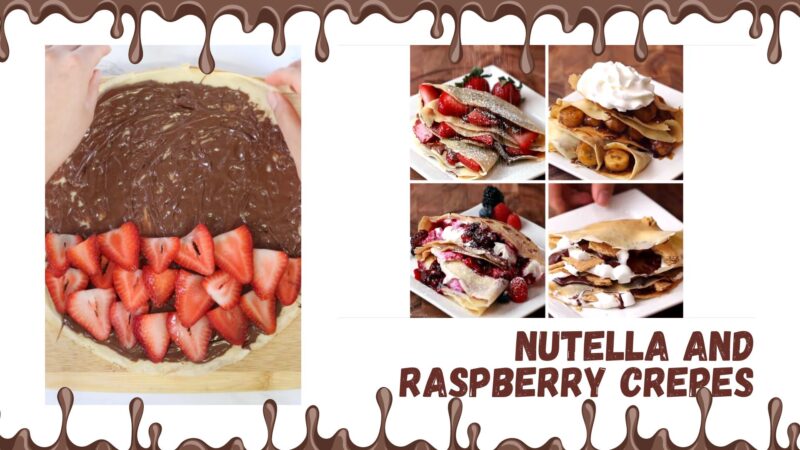
Crepes, originating from Brittany, France, are believed to date back to the 13th century. These thin, delicate pancakes were initially made with buckwheat flour. In the 20th century, the sweet version we know today emerged, with the crepes filled with a wide array of delectable ingredients. Combining the heavenly Nutella spread with tangy raspberries creates a mouthwatering crepe that celebrates the best of French dessert innovation.
Ingredients:
- 1 cup all-purpose flour
- 2 large eggs
- 1/2 cup milk
- 1/2 cup water
- 2 tablespoons unsalted butter, melted
- Nutella or chocolate hazelnut spread
- Fresh raspberries
- Powdered sugar for dusting
Instructions:
- In a large mixing bowl, whisk together the flour, eggs, milk, water, and melted butter until smooth.
- Heat a non-stick skillet or crepe pan over medium heat and grease it lightly with butter or oil.
- Pour a small ladleful of the crepe batter into the skillet, swirling it around to cover the bottom evenly.
- Cook the crepe for about 1 minute or until the edges start to lift and the surface appears dry.
- Carefully flip the crepe and cook the other side for another 30 seconds to 1 minute.
- Slide the cooked crepe onto a plate and cover it to keep warm.
- Repeat the process with the remaining batter, stacking the cooked crepes on top of each other.
- To serve, spread a generous amount of Nutella on one half of each crepe.
- Add a few fresh raspberries on top of the Nutella and fold the crepe in half, then in half again to form a triangle.
- Dust the Nutella and raspberry crepes with powdered sugar and serve them immediately.
FAQs
Are the ingredients for these desserts readily available?
Absolutely! Most of the ingredients required for these desserts can be found in regular grocery stores. You may already have some of them in your pantry.
Can I customize these desserts to suit dietary restrictions?
Yes, some of these desserts can be easily customized. For instance, you can use dairy-free alternatives like coconut cream or almond milk in the lemon mousse or creme brulee.
Are these desserts suitable for large gatherings?
Yes, these desserts are perfect for serving a crowd. You can double or triple the recipes to accommodate more guests.
What equipment do I need to make these desserts?
The desserts can be made using basic kitchen equipment like mixing bowls, saucepans, baking sheets, and handheld mixers. A kitchen torch is needed for caramelizing the creme brulee.
Conclusion:
As our culinary journey comes to a close, we’ve discovered that creating fancy desserts to impress your guests doesn’t have to be an arduous task. From the origins of chocolate fondue in Switzerland to the French roots of creme brulee, each dessert we explored carries with it a rich history and a touch of elegance.
Amidst these ten delightful treats, the captivating aroma of Turkish coffee beckons. Originating from the vibrant culture of Turkey, this strong and flavorful coffee is brewed to perfection using finely ground coffee beans, water, and a hint of spice. Its preparation is an art form, often accompanied by a sense of ritual, as the grounds settle into a rich and potent elixir.
But our journey doesn’t end there. The sweet symphony of flavors continues, from the tangy notes of lemon mousse to the harmonious blend of Nutella and raspberry in a delicate crepe. Armed with simple ingredients and step-by-step instructions, you can now confidently whip up these mouthwatering desserts, infused with the essence of Turkish coffee and white chocolate, to surprise and delight your loved ones on any occasion.
So, embrace your inner pastry chef, and let the enticing melodies of Turkish coffee and the elegance of white chocolate inspire your creations. With each dessert masterpiece, a new chapter of indulgence unfolds. Bon appétit!
Hi, I’m Dean Terry, and cakes are my life! I’ve spent over a decade perfecting the art of creating cakes that not only look incredible but taste unforgettable. What started as a hobby in my own kitchen quickly turned into a full-on passion, and now I get to craft one-of-a-kind cakes for weddings, birthdays, and big celebrations.
For me, it’s all about the details—whether I’m designing an elegant buttercream finish or a crazy multi-tiered cake with wild designs, I make sure each cake tells a story. I’m always experimenting with flavors and techniques, because why settle for the ordinary when you can create something extraordinary?
When I’m not up to my elbows in frosting, you’ll probably find me teaching others how to bake or dreaming up my next big cake challenge. If there’s one thing I believe, it’s that every great celebration deserves a cake that’s as special as the moment itself!


